Nothing ruins a gaming session faster than stick drift. You’re lined up for the perfect headshot in Call of Duty or trying to platform in Mario, and suddenly, your camera starts spinning toward the sky. It feels like a ghost has taken over your console.
Before you drop $70 on a brand-new controller, take a breath. Most of the time, this is a fixable issue. Whether you’re dealing with the infamous Joy-Con drift or a stubborn DualSense analog stick, this guide will walk you through the process of getting your aim back on point.
Before you start: Use our stick-drift-test/ tool to see exactly how much your sensors are off-balance. This helps you identify if the issue is a minor jitter or a major hardware failure.
What Exactly Is Stick Drift?
Technically known as analog stick drift, this happens when your controller registers movement even when you aren’t touching the thumbsticks.
Most modern controllers use potentiometers—tiny components that use friction to measure the position of the stick. Over time, dust, skin cells, or wear and tear on the internal sensor wheels cause the electrical signal to get “noisy.” Your console sees this noise as input, and suddenly, your character is walking off a cliff while you’re just trying to eat a slice of pizza.
Level 1: The Quick Fixes (No Tools Required)
Sometimes the simplest solution is the right one. Before we start taking screws out, try these “soft” fixes.
1. Update Your Controller Firmware
It sounds silly, but software bugs can occasionally mimic joystick drift.
- PS5: Go to Settings > Accessories > Controller > Wireless Controller Device Software.
- Xbox: Open the Xbox Accessories app on your console or PC and check for updates.
- Switch: Go to System Settings > Controllers and Sensors > Update Controllers.
2. Recalibrate Your Deadzones
Many modern games (like Apex Legends, Fortnite, or Halo) have Deadzone Settings. A deadzone is a “dead” area in the center of your stick where the game ignores input. If your drift is slight, increasing your deadzone from, say, 0.05 to 0.12 might completely “hide” the drift without affecting your gameplay.
3. The “Press and Rotate” Method
Sometimes, a bit of debris gets trapped in the sensor housing.
- Click the thumbstick down (L3 or R3).
- Rotate the stick in a clockwise motion for 30 seconds.
- Repeat in a counter-clockwise motion.
- Pull the stick slightly upward and blow compressed air into the base.
Level 2: Cleaning the Sensors (The “Pro” Cleaning Method)
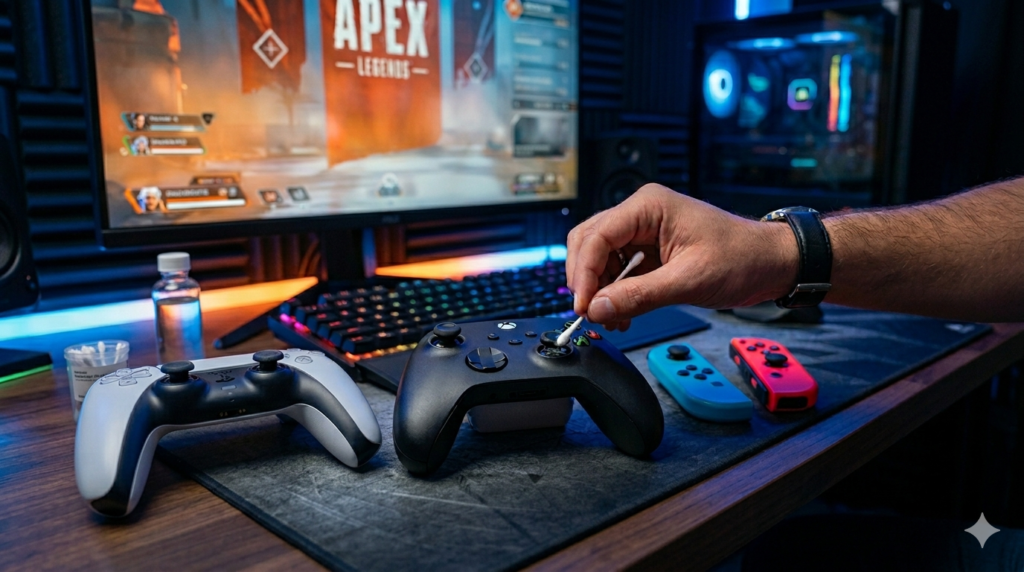
If the quick fixes didn’t work, it’s time to get some cleaning supplies. You will need 70% (or higher) Isopropyl Alcohol and a Q-tip.
How to Clean Your Thumbsticks
- Power down: Turn off the controller and disconnect it.
- Dab the Q-tip: Soak it in the alcohol, but make sure it isn’t dripping.
- The Base Wipe: Rub the Q-tip around the rounded “ball” at the base of the analog stick.
- Work it in: Move the stick around in circles so the alcohol seeps down into the potentiometer housing. This helps dissolve oils and grime that cause signal interference.
- Dry: Let it sit for 5-10 minutes before turning it back on.
How to Fix PS5 Controller Drift (DualSense)
The PS5 DualSense is a piece of engineering magic, but its haptic triggers and advanced motors make it sensitive. PS5 controller drift fix methods often involve a hard reset.
- The Reset Button: On the back of the DualSense, there is a tiny hole next to the “Sony” logo. Use a paperclip to press the button inside for 5 seconds. This clears the controller’s cache and re-pairs it with the console.
- Compressed Air: The DualSense has a very tight seal. Use a can of compressed air to blow out the gaps while moving the stick.
How to Fix Xbox Stick Drift (Series X/S & Elite)
Xbox controllers are known for being tanks, but even they fall victim to xbox stick drift.
- Check the Ring: Xbox sticks have a plastic ring around the base. If this ring wears down, plastic dust can fall into the sensor. Clean this area regularly with a dry cloth.
- The Accessories App: Xbox has a robust calibration tool. Go to the Xbox Accessories App, select your controller, and use the “Recalibration” feature. This allows you to manually reset the “center” of your thumbsticks.

Fixing Nintendo Switch Joy-Con Drift
Nintendo’s Joy-Con drift is legendary—and not in a good way. Because Joy-Cons are so thin, the sensors are incredibly fragile.
- The Cardboard Fix: A popular community fix involves placing a tiny piece of thin cardboard (about 1mm thick) inside the Joy-Con on top of the analog stick housing. This adds pressure to the sensor, keeping the components in contact.
- Calibration: Go to System Settings > Controllers and Sensors > Calibrate Control Sticks. Follow the on-screen prompts to see if the “crosshair” returns to the center.
- Official Repair: In many regions, Nintendo offers free controller drift repair for Joy-Cons, even out of warranty. Check their official support site before trying to open it yourself!
Level 3: Hardware Surgery (Advanced)
If you’ve tried cleaning and recalibration and the drift persists, the sensor wheels inside the potentiometer might be physically worn out.
Using Electronic Contact Cleaner
Specialized products like BW-100 or DeoxIT are designed specifically for electronics. Unlike standard alcohol, these sprays are formulated to clean electrical contacts without leaving any residue.
- Spray a small amount directly into the base of the stick.
- Wiggle the stick vigorously.
- This is often the “miracle cure” for controller drift repair.
Potentiometer Replacement
This is for the brave. It involves opening the controller shell (usually requiring a T8 security Torx for Xbox or a small Phillips for PS5/Switch).
- Open the casing.
- Pop open the green or black “flaps” on the side of the analog stick module.
- Replace the small white sensor disk inside with a new one (you can buy these in packs of 10 for a few dollars).
- Warning: This may void your warranty. If you aren’t comfortable with small plastic clips, skip this step.
The Future: Hall Effect Sensors
If you are tired of fixing stick drift every six months, look into Hall Effect controllers.
Unlike standard controllers that use friction-based potentiometers, Hall Effect sticks use magnets to measure position. Since no parts are touching, there is no physical wear and tear. This means they are virtually immune to drift. Brands like 8BitDo, Gulikit, and GameSir make high-quality Hall Effect controllers that work with PC, Switch, and Xbox.
How to Prevent Stick Drift in the Future
While you can’t stop time, you can slow down the wear on your controller:
- Wash your hands: Skin oils and snack dust are the primary enemies of sensors.
- Store them properly: Don’t leave your controllers face down or tossed in a drawer where the sticks are being pushed to one side for long periods.
- Use a Case: If you travel with your Switch or Pro controller, use a hard shell case to prevent “pressure drift.”
Summary Table: Which Fix Should You Use?
| Platform | Best First Step | Best Advanced Step |
| PS5 | Hard reset via back button | BW-100 Contact Cleaner |
| Xbox | Recalibration App | Replace sensor wheels |
| Switch | Calibrate in Settings | Cardboard pressure fix |
| PC | Increase Deadzones | Switch to Hall Effect Controller |
Final Thoughts
Learning how to stop joystick drift is a rite of passage for modern gamers. Start with the software fixes, move to the cleaning methods, and only reach for the screwdriver if you’re out of options.
Remember, if your controller is still under warranty, contact the manufacturer first. Opening the shell usually ends your chance at a free official repair. But if you’re out of warranty and that “ghost” movement is ruining your K/D ratio, don’t be afraid to get your hands a little dirty.
Happy gaming, and may your crosshairs always stay centered!