If your Nintendo Switch character keeps moving when you’re not touching anything, you already know the frustration. That annoying, game-ruining problem has a name — Joy-Con drift — and you’re definitely not alone. It’s one of the most common complaints from Switch owners worldwide, and it’s been that way since the console launched.
The good news? You can test for it yourself, and in many cases, fix it without sending anything away or spending much money. This guide walks you through exactly that — from confirming the issue to the most effective Joy-Con stick drift fixes available right now.
What Is Joy-Con Drift, Exactly?
Joy-Con drift (sometimes called Nintendo Switch analog stick drift or switch controller drift) happens when the analog stick on your Joy-Con registers movement without you touching it. Your camera might slowly spin, your character might walk off a ledge, or your cursor might creep across a menu.
It’s not a software glitch. It’s a hardware problem — and it typically gets worse over time if left alone.
The root cause comes down to two things. First, the small carbon contact pads inside the stick mechanism wear down with regular use, reducing their ability to accurately detect stick position. Second, dust and debris accumulate under the rubber cap and inside the joystick housing, interfering with the sensors. Nintendo has faced lawsuits and class action cases over this issue, and at one point even offered free Joy-Con drift repairs — though that program has had mixed availability depending on your region.
How to Test for Joy-Con Drift
Before you try any fixes, you need to confirm the drift is real and not a game-specific issue. Here’s how to run a proper Joy-Con controller drift test.
Using Nintendo Switch’s Built-In Controller Test
The Switch has a hidden stick test tool that many users don’t know about:
- Go to System Settings on your Switch
- Scroll down to Controllers and Sensors
- Select Calibrate Control Sticks
- Press the stick you want to test — don’t move it at all
If the crosshair on screen drifts away from center while your thumbs are completely off the stick, that confirms Nintendo Switch stick drift. No guesswork needed.
Using an Online Gamepad Tester
Another reliable method is using a browser-based controller testing tool (like testyourgamepad.com). Connect your Joy-Con via Bluetooth or USB-C adapter, open the tester, and watch the live stick visualization. If the axes move on their own without any input, drift is confirmed.
This method is actually more sensitive than the Switch’s built-in tool and can catch early-stage drift before it becomes severe.
Testing in a Game vs. Testing in a Menu
Some people only notice drift during gameplay, which can make them think it’s game-specific. Test in a menu or the home screen instead — if you see the cursor or selection box drifting, that rules out any game-related cause and points directly to your Joy-Con hardware.
Joy-Con Drift Fix Options — From Easiest to Most Involved
There’s no single fix that works for everyone. The right approach depends on how bad your switch controller drift is and how comfortable you are opening up hardware. Here’s the full list, starting with the simplest.
Fix 1: Update Your Controller Firmware
This sounds too simple, but it’s worth doing first. Nintendo occasionally pushes Joy-Con firmware updates that improve stick calibration and reduce drift symptoms.
Go to System Settings → Controllers and Sensors → Update Controllers. Make sure your Joy-Con is attached to the Switch and let it check for updates. This won’t cure physical wear, but it can help with borderline cases where the stick reads slightly off.
Fix 2: Recalibrate the Analog Sticks
Still in System Settings → Controllers and Sensors, select Calibrate Control Sticks. Follow the on-screen prompts to manually set the center point and range of motion for each stick.
This is useful when drift is inconsistent or minor. Recalibration essentially resets the stick’s baseline, which can eliminate phantom inputs that come from a slightly misread center position rather than real physical damage.
Fix 3: Increase the Deadzone in Games
Not a true Joy-Con drift fix, but it’s a practical workaround while you sort out the hardware. Many games — especially PC titles if you’re using your Joy-Con via adapter — allow you to increase the controller deadzone. This creates a buffer zone where small, unintended movements don’t register as real input.
On Switch, you won’t find this as a system-wide option, but some titles have it buried in accessibility or control settings. It won’t stop the drift, but it can make games playable again while you work on a proper solution.
Fix 4: Use Compressed Air to Clean Under the Stick Cap
Dust and debris under the joystick cap is a surprisingly common cause of Nintendo Switch analog stick drift — particularly on Joy-Cons that have seen heavy use.
Without opening anything:
- Tilt the analog stick to one side to expose the gap at the base
- Use a can of compressed air (held upright) to blow short bursts under the cap from different angles
- Rotate the stick while doing this to loosen any debris
Do this a few times and then retest using the Switch’s stick calibration screen. Many people report that this alone stops drift completely, at least temporarily. It’s free to try and takes under two minutes.
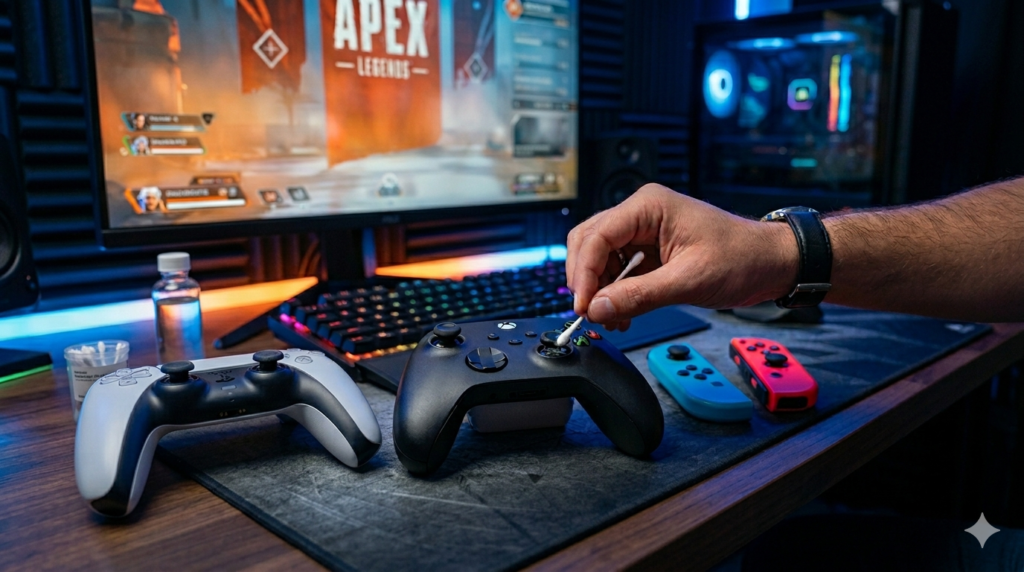
Fix 5: Apply Contact Cleaner to the Stick Mechanism
This is one of the most effective Joy-Con drift fixes that doesn’t require full disassembly, and it’s become popular in the repair community.
You’ll need electrical contact cleaner spray — specifically a brand that’s safe for plastics and electronics (WD-40 Contact Cleaner or DeoxIT D5 are commonly used).
- Peel back or remove the rubber cap on the analog stick
- Tilt the stick and spray a small amount of contact cleaner into the base of the mechanism
- Rotate and press the stick in multiple directions to work the cleaner through
- Let it dry for 10–15 minutes before testing
This method dissolves the oxidation and contamination on the carbon contact pads that causes joy-con stick drift. Results can be dramatic — sticks that were drifting constantly often become completely stable. The effect can last months, and the spray is cheap enough to reapply as needed.
Fix 6: Replace the Analog Stick Module
If cleaning methods don’t hold, the carbon pads inside your stick are worn beyond recovery. At that point, replacing the stick module is the only permanent fix for Nintendo Switch drift.
Replacement Joy-Con thumbstick modules are available on Amazon and AliExpress for around $5–$15, and the process — while not beginner-level — is manageable with the right tools.
You’ll need:
- A Y00 tri-point screwdriver (specific to Joy-Con)
- A JIS #000 Phillips screwdriver
- A plastic pry tool or spudger
- Your replacement analog stick module
There are detailed video guides available for both left and right Joy-Con disassembly. The stick connector is a small ZIF (zero insertion force) ribbon cable — handle it gently. Total repair time is around 30–45 minutes for a first-timer.
Replacement sticks from third-party suppliers often use improved materials compared to the original Nintendo components, which is why many users report that their repaired Joy-Con actually drifts less than it did when new.
Fix 7: Nintendo Repair or Replacement
If you’re not comfortable doing any of the above, or your Joy-Con is still under warranty, Nintendo repair is an option. In some regions and time periods, Nintendo has repaired Joy-Con drift for free even out of warranty — it’s worth contacting their support to check what’s currently available in your area.
You can also buy replacement Joy-Con controllers outright, though at $40–$80 a pair, that’s a significant cost compared to a $10 fix.
How to Prevent Joy-Con Drift in the Future
Once your switch controller drift is resolved, a few habits can slow it from coming back:
Keep your Joy-Con away from dusty environments when possible. Store your Switch in a case. Don’t press the analog stick harder than needed — grinding it into menus or UI elements accelerates wear on the contact pads. Some players also use silicone thumb grip covers that redistribute pressure more evenly across the stick cap.
There are also third-party Hall effect analog stick replacements now available for the Joy-Con. These use magnetic sensors instead of carbon contacts, which means they theoretically never drift. They’re a more advanced install but increasingly popular among serious Switch users who’ve been through multiple sets of sticks.
Quick Summary
Joy-Con drift is a hardware issue, not a software glitch, and it almost always gets worse over time if ignored. Test for it using the Switch’s built-in calibration screen or a browser-based gamepad tester. Start with the simplest fixes — firmware updates, recalibration, compressed air — before moving to contact cleaner or full stick replacement. Most cases of Nintendo Switch drift are fixable at home for very little money, and you don’t need to live with it